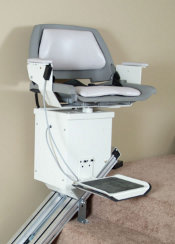
Installing an AmeriGlide Stair Lift: Part 1
Published by Stephen on July 2, 2009 Under stair lifts Stair lifts are used to make using the stairs safer and easier for seniors and others who are mobility challenged. There are several different kinds and models, but for those who have a straight staircase, a stair lift can usually be installed in an afternoon.
AmeriGlide is a company that offers a number of different stair lifts that can be self installed in only a few hours. In addition to offering a number of quality stair lifts, AmeriGlide also sells many other mobility aids, such as wheelchair lifts and scooter lifts.
There are two main types of stair lifts;AC Stair Lifts and DC Stair Lifts. The AC stair lift is run directly off of the homes power.
The DC Stair Lift, on the other hand, is battery powered. It will still need to be plugged into the wall, but the electric motor in the lift is run off of a set of rechargeable batteries. Although they have a slightly higher upfront cost, DC stair lifts, which are often called battery powered stair lifts, have the advantage of continuing to work if the power is disrupted.
The installation of an AC stair lift is discussed in this article series, however many of the steps will remain the same. Most stair lifts use a metal track system, which is attached directly to the staircase. This metal track runs the distance of the staircase and is precut my the manufacturer, so the homeowner will typically only need to worry about the actual assembly of the stair lift.
Unpacking, Reading Instructions, and Gathering Tools
When the stair lift arrives, it will come in at minimum 3 boxes. The chair and the electrical chassis are both shipped in separate boxes. The metal track also comes in its own box, although depending on how long the staircase is, the track might be shipped in multiple boxes.
Once the stair lift arrives, locate the instructions, which are usually shipped in the box with the chassis. Go ahead and read over the instructions once. The instructions will contain a list of the tools required. Most are common tools, such as a level, socket wrench, power drill, and pliers.
Orienting the Track and Gear
After you have assembled all of the tools, it is a good idea to do a quick inventory of the parts. The mounting hardware for the track should be contained in the track box, with the chassis box containing the wireless remotes, the power supply, and some other components.
It is also important to determine if the stair lift will be installed on the left side of the staircase or the right side of the staircase. It can be installed onto both sides. However, most stair lifts are configured for a right hand installation, so if it will be installed onto the left of the staircase, a few changes will need to be made.
The first step of the installation involves laying the track on the stairs, connecting the individual pieces of the track, and attaching the mounting hardware to the track.
The gear, which runs the distance of the track needs to be facing the wall. This is one factor that will change depending on what side of the staircase you are installing the lift to.
No Comments |
Add a Comment